If you’ve ever worked with steel grating for industrial flooring, walkways, or drainage covers, you know that uneven surfaces are one of the most common headaches we run into as suppliers. Last month, a regular client of ours called panicking after receiving a batch of our standard galvanized steel grating—their new warehouse foundation had settled unevenly over winter, and the grating they ordered wouldn’t sit flush. They’d already tried propping it up with random scraps of steel, only for one of their maintenance crew to trip and scrape their boot that same week. That call stuck with me because it’s the exact problem we see way too often: people buying steel grating for its durability and safety, but overlooking how to adapt it to uneven base surfaces. As a steel grating supplier with 12 years on the ground, I’ve helped dozens of clients fix this issue without compromising the grating’s structural integrity, and today I’m breaking down exactly how we do it. Steel Grating
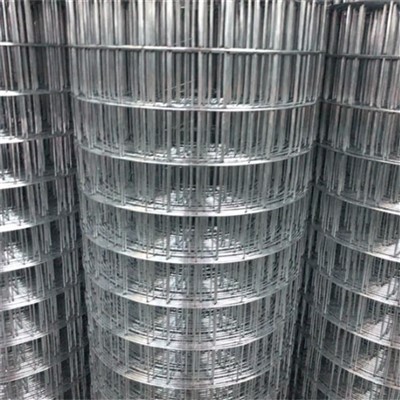
First, let’s get one thing straight: steel grating isn’t a one-size-fits-all solution. We engineer our products to perform best on level, properly prepared surfaces, but that doesn’t mean uneven terrain is a dealbreaker. The key is addressing the unevenness at the base before you even lay the grating, not trying to force the rigid metal panels to match an irregular surface. I’ve seen guys beat grating with sledgehammers to bend it into place—don’t do that. You’ll warp the load-bearing bars, create weak points that rust faster, and void any structural warranty we offer. Instead, let’s walk through the step-by-step process we recommend for every client dealing with uneven surfaces, from minor slopes to more significant settlement.
Step 1: Map and Document the Unevenness Before You Touch a Wrench
I always tell clients to skip the quick lay-and-pray approach. Grab a long, straight level (a 6-foot aluminum level works best for industrial spaces) and a chalk line, and run it along every edge of the area where you’ll install grating, plus every 4 feet across the middle. Mark any spots where the level dips below the surface (low points) or sits above the surface (high points). For example, if your warehouse floor has a 1.5-inch dip along the back wall, that’s a consistent low spot that needs a shim, not a makeshift prop. For more erratic unevenness—like a patio with several small, unconnected high spots—measure the height of each high spot and note their positions on a sketch.
Why does this matter? Last year, a factory in Ohio tried to install our 3x10ft standard steel grating on a concrete slab that had settled unevenly, skipping this mapping step. They propped random 2x4s under the corners of each panel, and within six months, half the panels had shifted. The gaps between the grating panels widened, and debris got stuck, creating tripping hazards. When they called us to fix it, we did the mapping step first and found the slab had a total slope of 2 inches over the entire 20-foot walkway. That small detail made all the difference in how we adjusted the installation.
Step 2: Prep the Base Surface to Eliminate High Spots (If Possible)
Once you’ve mapped the unevenness, your first move is to eliminate any high spots that are taller than ¼ inch. That’s a threshold we always cite as a safe maximum for unleveled surfaces—anything more than that creates a pivot point where the grating can rock, wear out faster, or even shift under load. For concrete surfaces, we use a concrete grinder to sand down high spots. It’s fast, leaves a smooth, level base, and works perfectly for industrial concrete or even asphalt. If you’re working with dirt or gravel bases (like for outdoor walkways), remove all loose debris and tamp the ground firmly before leveling it with a layer of compacted crushed limestone. Limestone is ideal because it compacts evenly, won’t shift over time like loose sand, and creates a stable bed for the grating.
For minor high spots on steel bases—like an old metal walkway that’s warped a little—you can use a die grinder or wire wheel to smooth the rough edge. Just be careful not to remove too much metal, as that could weaken the base. We always warn clients not to grind more than 1/8 inch off steel bases, and to wear proper eye and ear protection when doing this work.
Step 3: Choose the Right Shimming Solution for Remaining Low Spots
After prepping high spots, you’ll almost always have low spots left—especially if the unevenness is due to foundation settlement or grade changes. The goal here is to use shims that are durable enough to support the grating’s load, but also flexible enough to adjust to subtle irregularities. Here’s what we recommend, based on the type of load your grating will carry:
For light loads (like pedestrian walkways or drainage covers for light foot traffic): Use steel shims. Our standard galvanized steel shims come in thicknesses from 1/16 inch to ½ inch, and they cut easily with aviation snips to fit the exact shape of the low spot. We don’t recommend rubber or plastic shims here—they compress over time, especially under repeated foot traffic, which leads to gaps. One trick we teach: lay the grating panel on the area, and slip shims under each corner and midpoint until the panel sits flat when you press down firmly. Don’t over-tighten the shims; just enough to eliminate rocking.
For medium to heavy loads (like forklift accessways or industrial work platforms): You’ll need heavier-duty support. Our go-to here is fabricated steel support brackets. These are custom-cut to fit the length and width of your grating, and they come with pre-drilled holes so you can bolt them to the base surface. If you have a low spot that’s ½ inch or deeper, a bracket is far more reliable than a stack of small shims because it distributes the load evenly across the entire length of the panel, not just a few points. For example, if you’re installing grating for a loading dock that forklifts will drive over, a 4-inch steel bracket running under the full 10-foot length of the panel will handle up to 10,000 lbs per linear foot—way more than a stack of wood shims ever could.
One thing to avoid: mixing different types of shims. If you use a steel shim under one corner and a rubber shim under another, the rubber will wear faster, creating an uneven surface within a year. Stick to the same material for all shimming on a single installation.
Step 4: Adjust Grating Panel Sizing for Sloped Surfaces
If your uneven surface is a consistent slope (like a ramp or a foundation that settled evenly along one edge), you don’t have to cut full panels to fit—we offer partial panel cuts as a custom option, and it’s way easier than you think. For example, if you have a walkway that slopes 1 inch over 10 feet, instead of shimming every panel under the back edge, you can have one of the end panels cut at an angle to match the slope. When you install it, it will sit flush against the base, and the rest of the panels will follow the level of that first angled panel.
When we do custom cuts for clients, we always use plasma cutters for steel grating because they make a clean, straight cut that doesn’t leave sharp burrs that can catch on shoes or tools. If you’re cutting panels yourself, use a circular saw with a metal-cutting blade, and wear gloves to protect your hands from the sharp edges. Just make sure to round any sharp corners with a file before installing—those burrs are a safety hazard.
Step 5: Secure the Grating Properly to Prevent Shifting
Even if you level the panel perfectly, it can shift over time if it’s not secured correctly. On level surfaces, we usually recommend welding or bolting every other panel, but on uneven surfaces, you’ll want to secure every single panel edge to the base. Here’s how we do it, based on the base material:
For concrete bases: Use expansion anchors. We recommend ¼-inch hex-head concrete anchors, spaced every 12 inches along each edge of the grating panel. Drilling the holes straight is key—if the hole is at an angle, the anchor won’t grip the concrete properly. If you have shims under the panel, make sure the anchor goes through the grating’s bearing bar and into the shim, then into the concrete. That keeps the shim in place and prevents it from shifting.
For steel bases: Use self-tapping screws or weld points. Self-tapping screws are fast and easy for small installations—just make sure they’re corrosion-resistant (stainless steel or hot-dip galvanized) so they don’t rust out. For heavier loads, welding is better, but we always use a continuous weld along the edge of the grating, not just spot welds. Spot welds are weak and can break under heavy load, especially if the base is uneven.
Last year, a client in the construction industry installed our grating on a sloped walkway and only bolted every other panel. Within three months, one of the unbolted panels slid down the slope, creating a 2-inch gap between it and the next panel. A worker tripped, and the client had to pay for medical bills plus rework the entire installation. That’s why securing every panel is non-negotiable, even on uneven surfaces.
Common Mistakes to Avoid (I’ve Seen All of These)
Over the years, I’ve seen so many clients make avoidable errors when installing grating on uneven surfaces. Let me spell them out clearly so you don’t fall into the same traps:
- Forcing grating into place: As I mentioned earlier, bending or forcing rigid steel grating to fit an uneven surface warps the load-bearing bars, which are designed to hold weight evenly across the panel. A warped bar can crack under load, leading to a costly failure.
- Using unrated shims: Wood, plastic, or thin aluminum shims might work for small jobs, but for industrial or heavy-use areas, they’re not durable. Steel shims or brackets are the only way to ensure the load is distributed correctly.
- Skipping the mapping step: It’s tempting to start laying panels right away, but mapping the unevenness takes 10 minutes and saves you hours of rework later.
- Ignoring rust prevention: When you grind or cut grating to fit an uneven surface, you expose bare steel. Always touch up the cut edges with galvanized spray paint (the same zinc-rich coating we use on our standard grating) to prevent rust from forming in those vulnerable spots.
- Installing without a safety gap: Even on uneven surfaces, leave a ¼-inch gap between adjacent panels. That gives the metal room to expand and contract with temperature changes, which prevents buckling in summer or cold cracking in winter.
When to Call a Professional
Don’t get me wrong—this is a DIY-friendly process for small projects, but if you’re working on a large-scale installation (like a full warehouse floor, loading dock, or outdoor patio) with significant unevenness (more than 2 inches of total settlement), it’s worth calling a professional. As steel grating suppliers, we work with industrial contractors every day who specialize in surface prep and grating installation, and we can connect you to reliable folks in your area if you need it.
Now, a quick note from us at [omitted company name]: we don’t just sell steel grating—we support our clients through every step of the process, from selecting the right grade for your load to troubleshooting uneven surfaces. If you’re not sure what grade of grating you need, or if you have questions about custom cuts or shimming solutions, our team is here to help. We’ve worked with everyone from small business owners building a backyard patio to large factories expanding their production floors, and we tailor every solution to your specific needs.
Before we wrap this up, let’s recap the most important rule: uneven surfaces don’t have to mean a bad installation. The key is to prepare the base, adjust the grating (using custom cuts or quality shims) to fit the base, and secure every panel properly. Skip the quick fixes, take the time to measure and prep, and you’ll end up with a durable, safe steel grating installation that lasts for decades.

If you’re ready to talk about your next steel grating project, or you need advice on how to adapt a specific surface, don’t hesitate to reach out to our team. We’re always happy to help, no matter how big or small your job is.
Wedge Wire Screen Cylinder References
- Steel Grid Products Council. (2021). Installation Guidelines for Steel Grating. National Association of Architectural Metal Manufacturers.
- OSHA. (2022). Fall Protection Guidelines for Industrial Walkways and Platforms. Occupational Safety and Health Administration, 29 CFR 1910.22.
- Galvanized Steel Institute. (2020). Shimming and Base Preparation for Steel Grating Installations. American Iron and Steel Institute.
- Concrete Foundation Network. (2019). Correcting Minor Slope and Settlement in Industrial Concrete Slabs. Portland Cement Association.
Hebei Zhenou Wire Mesh Products Co., Ltd.
As one of the most professional steel grating manufacturers and suppliers in China, we’re featured by quality products and good price. Please rest assured to buy discount steel grating for sale here from our factory. Customized orders are welcome.
Address: Anping Economic Development Zone, Hengshui City, Hebei Province, China
E-mail: anna.zowm@gmail.com
WebSite: https://www.zowiremesh.com/
