Hey everyone! If you’ve been scrolling through your garage, closet, or even your tiny apartment kitchen lately and thinking “where did all this stuff go?”, you’re not alone. I’m someone who’s spent years in the storage shelf game—first as a small-time contractor helping folks fix wobbly shelves, now as a supplier who gets daily DMs from people tired of paying ridiculous prices for flimsy store-bought units. That’s why I put together this no-BS DIY storage shelf guide: it’s doable, budget-friendly, and way more customizable than anything you can grab off a shelf. No fancy tools needed, I promise—just some patience and a little know-how. Storage Shelf
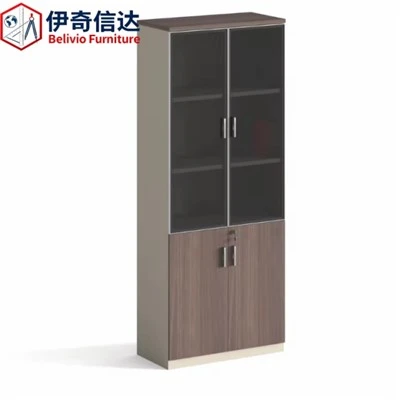
First, let’s cut to the chase: why DIY instead of buying? I’ve seen so many people drop $100 on a “heavy-duty” shelf that bends under a stack of camping gear or pantry cans. Most pre-made shelves use thin particleboard that warps in humidity, or metal frames that rust if you so much as spill a cup of water. When you build your own, you get to pick every part: the length, the number of tiers, even the finish to match your space. It’s also way cheaper if you shop smart—we’re talking $50 tops for a unit that’ll last years, not months.
Now, let’s walk through the steps like I’m chatting with a friend. No confusing jargon, just what works in real life.
Step 1: Size it right (no more guessing games)
Before you even step foot in a hardware store, grab a tape measure and jot down your space. Are you putting this in a closet? Measure the width, height, and depth of the gap—leave 2 inches on each side so you can slide it in without jostling clothes or boxes. Garage? Make sure you account for the height of your car door (nothing’s worse than building a 7-foot shelf only to realize it clunks your SUV). I always tell people to leave at least 6 inches between the top shelf and any overhead lights or pipes too—you don’t want to spend an hour building it just to knock a bulb loose.
Also, think about what you’re storing. Pantry cans need at least 12 inches of depth, so they don’t roll off. Books are thin, so a 10-inch deep shelf works. Heavy stuff like tools or water jugs? Go deeper—16 inches minimum, and make sure the shelves are sturdy enough. If you’re storing super heavy items, skip flimsy wood and go for a thicker material, but we’ll get to that later.
Step 2: Gather your supplies (keep it simple)
You don’t need a whole workshop here. I’m going to list exactly what I use for 90% of my DIY builds—this is the setup that works for renters and homeowners alike. Let’s break it down:
- Framing material: For the frame, 2x4s are your best bet. They’re cheap, easy to cut, and strong enough for almost anything. If you want a nicer finish for a closet or living space, go for 1x6s instead—they’re thinner and look cleaner, but a little less heavy-duty.
- Shelf boards: Plywood is the way to go here. Avoid particleboard or MDF—they soak up moisture and crumble over time. ¾-inch thick plywood is perfect; it’s not too heavy to lift, but stiff enough to hold 50+ pounds per shelf. If you want a rustic look, solid pine works too, just make sure it’s 1 inch thick so it doesn’t sag.
- Hardware: This is where a lot of people cut corners and end up with wobbly shelves. You’ll need: 3-inch wood screws (for attaching the frame joints), 1.5-inch screws (for attaching shelves to the frame), metal L-brackets (4 per corner—trust me, these stop wobbling like nothing else), and a stud finder (so you can mount it to a wall if you want it extra stable). Optional: Drywall anchors if you’re screwing into plaster walls instead of studs.
- Tools: You don’t need a power saw if you don’t have one—most hardware stores will cut your wood for free when you buy it. All you actually need is a drill (any cordless one works), a tape measure, a pencil, and a level (super important—you don’t want your cereal boxes sliding off the slanted shelf).
Pro tip from someone who’s made every mistake: Buy extra. Wood splits when you cut it wrong, screws get lost, and you’ll always need a spare L-bracket. A $5 extra run is way better than stopping mid-build at 8 PM on a Sunday.
Step 3: Build the frame (don’t skip this part!)
Let’s start with the skeleton—this is what holds everything up, so take your time. First, cut your 2x4s to size. For a basic 4-foot wide, 6-foot tall shelf, you’ll need: two side posts (6 feet each), two front posts (6 feet each), and horizontal crossbars for the top, middle, and bottom. Wait, no—wait, actually, let’s keep it super simple for beginners: make a rectangle frame first. Cut two side pieces that are your total height (say, 72 inches) and two front pieces that are your total width (say, 48 inches). Then, to add support between the sides, cut two more pieces (48 inches each) for the middle and top, so you have 3 horizontal bars on each side. That makes the frame look like a ladder standing on its side—easy to build, and super stable.
Now, attach the corners. Line up a side post and a front post, drill a pilot hole (so the wood doesn’t split), then drive a 3-inch screw through both pieces. Do this for all four corners. Then, attach the middle crossbars: set one midway up the side posts, drill pilot holes, screw it in—same for the top. Once the frame is together, set it up on a flat surface and give it a gentle shake. If it wobbles, go back and add another screw or an L-bracket to the joints. That’s where those brackets I mentioned earlier come in—screw one to the inside of each corner, it’s like a backbone for your shelf.
Step 4: Add the shelves (the fun part, almost)
Now for the parts that hold your stuff. Take your plywood shelf boards, cut them to your desired depth (let’s say 12 inches for pantry stuff). For 5 shelves, you’ll need 5 pieces of plywood. Slide each shelf into the gaps between the frame’s crossbars. Don’t just set them on top—secure them so they don’t slide out. Drill a 1.5-inch screw through the frame’s front crossbar into the front edge of the shelf, and another through the side crossbar into the side edge. This might seem overkill, but I’ve had shelves full of paint cans slide forward when I opened the garage door before—no joke, that’s a mess.
How many shelves? It’s up to you, but leave at least 10 inches between each shelf for standard items. If you’re storing tall things like cereal boxes or wine bottles, make that 12 inches. If it’s shoes, 8 inches works. And if you want adjustable shelves? That’s a trick! Drill ½-inch holes every 12 inches on the inside of the side posts, then use shelf pegs (cheap at hardware stores) to hold the shelves. No more rebuilding the whole thing when you decide you need more space for holiday decor.
Step 5: Finishing touches (make it yours)
This part’s optional but worth it. If it’s going in the garage, a quick coat of outdoor sealant will protect it from grease and humidity. If it’s going in the closet, paint it to match the walls, or stain it for a warm rustic look. For renters? Skip the paint—use peel-and-stick shelf liners to add color without damaging walls. I also recommend adding edge caps to the plywood shelves so you don’t get splinters when you reach in. Super easy, just stick them on with a little wood glue.
Wait, let’s talk about common mistakes I see all the time. First, not using a level. If your frame is off by even a degree, your shelves will slope, and everything will slide. Second, skimping on hardware. I’ve seen someone use 1-inch screws instead of 3-inch ones—their shelf collapsed under a load of textbooks, total waste of time. Third, measuring wrong. If you forget to leave space for door swing, your shelf will stick out when you open the closet door. Been there, fixed that too.
Now, when is DIY not the way to go? If you need a unit that’s taller than 8 feet, or way wider than 6 feet, or if you’re storing really heavy stuff like commercial-grade tools. That’s where a professional, custom storage shelf makes way more sense. That’s actually what I do here—we make heavy-duty custom units that fit any space, no wobbly frames, no warped wood, and we can build them to hold 500 pounds per shelf if you need it. No matter your needs, we can help you avoid all the mistakes I mentioned.
If you’ve got questions, or you’re ready to get a custom storage shelf that’s way sturdier than anything you can build yourself, just reach out to us. Whether you need a small unit for your apartment pantry or a whole system for your warehouse, we’ve got you covered. No hidden fees, no complicated processes, just solid storage that lasts.
Stainless Steel Shelving References:
- American Wood Council. (2022). “Recommended Lumber Sizes for Shelving.” Woodwork Magazine.
- DIY Network. (2021). “How to Build a Basic Garage Storage Shelf.” Home Improvement Guide.
- National Hardware Association. (2023). “Best Fasteners for Wooden Shelf Construction.” Hardware Industry Review.
- U.S. Department of Energy. (2022). “Moisture Resistance Tips for Wood Storage Units.” Energy Efficient Home Blog.
Luoyang Belivio Furniture Co., Ltd.
As one of the most professional storage shelf manufacturers in China, we have world-leading production equipment and strong manufacturing capabilities. Welcome to buy high-end storage shelf for sale here from our factory. Quality products and reasonable price are available.
Address: A7-4-601, Hundsun Science and Technology Park, Luolong District, Luoyang City, Henan Province, China
E-mail: belivio@toda.group
WebSite: https://www.beliviofurniture.com/
