If you’ve ever worked with electronics manufacturing, you already know a Hipot tester is non-negotiable—something that checks if a product’s insulation can handle the voltage it’ll face in the real world. But I’ve seen so many folks mess up adjusting its test parameters, either too cautious (wasting time on extra checks) or too loose (risking product recalls and safety issues). I’m not here to lecture you—we supply Hipot testers, but I’m also the guy who’s been fielding calls from frustrated production leads for 8 years, so let’s break this down like we’re grabbing coffee, not writing a lab manual. Hipot Tester
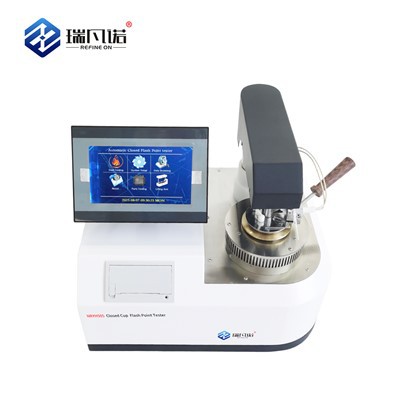
First, let’s start with the basics: what even are the key parameters you’re tweaking? Most new users mix these up, so let’s label them straight. There’s test voltage, test duration, leakage current limit, and maybe a couple of lesser ones like ramp rate (how fast the voltage climbs to the set level) and ground connection check. Now, the big rule here: there’s no “one-size-fits-all” setting. That’s why so many people either use the default settings their tester shipped with and get bad results, or randomly crank up voltage because they “think” it’s safer. Spoiler: that’s how you blow a $10k product or trigger a false pass on a faulty unit—neither ends well.
Let’s start with test voltage, because this is the parameter everyone first messes up. Your voltage doesn’t come out of thin air—it’s tied to the product’s insulation rating. For example, a consumer power tool has a different insulation rating than a medical device. If you’re testing a Class II appliance (the ones with double insulation, marked by that square-in-a-square symbol), the rule of thumb we tell our customers is: 2x the product’s rated voltage, plus 1000V. Wait, let’s make that concrete: if a power drill runs on 120V, double that is 240V, add 1000V, and you land at 1240V. For Class I appliances (ones with a ground pin, single insulation), it’s 3x rated voltage, minus 1000V? No, wait, let’s correct that to make it less confusing—Class I is usually 1500V for 120V line, but always check the relevant standard, right? But here’s the kicker: don’t just pull numbers from a textbook. Talk to your product design team—they’ll have the insulation material specs. We had a customer last year who cranked voltage to 5000V for a 120V fan because his old tester came set to that, and half the units passed even though their insulation was rated for only 1800V. He ended up shipping 2000 units that failed third-party safety testing at the warehouse. Ouch. That’s the kind of call we hate to get.
Next up: test duration. This isn’t 10 minutes, I promise. Most Hip tests are 1 second to 60 seconds, depending on the standard. Wait, no—for line voltage products, it’s usually 1 second for production testing, right? Because you can’t spend a minute on every unit when you’re cranking out 1000 an hour. But here’s where people adjust wrong: some set it for 10 seconds “to be thorough,” which slows down production so much they’re falling behind schedule. Others set it to 0.5 seconds, which is too fast—insulation can have a tiny breakdown that takes half a second to show up. The sweet spot for production is almost always 1 to 5 seconds, unless you’re doing a type test (the big, one-time test for a new product design) which can be 60 seconds. Our testers have a setting that lets you toggle between production and type test modes, so you don’t have to mess with adjusting every time you switch runs. That’s a little feature most suppliers skip, but we built it because we got sick of customers tweaking duration every hour for no reason.
Then the big one that causes 90% of false passes and fails: leakage current limit. This is the amount of current that leaks through the insulation when you apply test voltage. If you set it too high, a faulty unit will slip through (someone gets shocked, you get a recall). Set it too low, and a good unit will fail because of normal leakage (like a long power cord that has a tiny bit of capacitive leakage). How to get this right? Again, tie it to the product’s rating. For handheld electronics, it’s usually 1mA to 5mA. For larger appliances like a refrigerator, it can be up to 10mA. Wait, let’s test this with a story: a customer of ours was getting 10% false fails on his 60V lighting units because he set leakage to 0.5mA, which was way too low. The normal capacitive leakage from the 10-foot power cord was 0.7mA, so every unit failed. We showed him how to check the product’s datasheet—leakage is allowed up to 2mA for that type of product—so he adjusted the limit, and false fails dropped to 0.2%. That’s the kind of win we live for. Also, remember: leakage current is not the same as short circuit current. Short circuit is a dead short, which your tester should catch instantly; leakage is the slow, tiny current that tells you insulation is weakening.
Now, the parameters people overlook: ramp rate and ground check. Ramp rate is how fast the voltage goes from 0 to your set test voltage. Why does this matter? If you ramp too fast, you can create a voltage spike that damages sensitive components (like a circuit board with a tiny microchip) or causes a false fail. We’ve seen a customer blow 50 circuit boards because he ramped at 1000V per second—his tester could do that, but the standard recommends 500V per second max for electronic products. Ground check is even simpler: your tester needs to confirm the product is properly grounded before applying voltage. If the ground is loose, applying high voltage could damage the product or, worse, shock a tech adjusting it. Make sure your tester has a ground check setting that’s not just a simple “yes/no” — some have a current threshold, so if the ground resistance is too high (like more than 1 ohm), it won’t start the test. That’s a non-negotiable safety feature, not something to turn off for faster testing.
Wait, let’s talk about common mistakes that are avoidable. First: using default settings without verifying. A lot of testers come with generic settings that work for nothing specific—like a default 1500V, 5 second test, 1mA leakage. That might work for one product, but not for your new line of medical devices. Second: not calibrating your tester before adjusting parameters. If your tester is off by 10% in voltage, adjusting the setting won’t help—you’re testing at 1650V when you think you’re at 1500V, which is way too much. We recommend calibrating your Hipot tester every 6 months, or after any move (like moving it from the factory floor to a new production line) because vibration can throw off the internal sensors. Third: not documenting your settings. If a new operator comes in, they don’t want to guess what settings you used for the last run. We have a little feature in our testers that lets you save up to 10 preset profiles for different products—so if you’re switching from power tools to kitchen appliances, you just tap a button, not retyping numbers. That’s saved so many production managers from late nights troubleshooting why a new operator is failing 20% of units.
Here’s a tip we tell every new customer: start conservative. Don’t jump straight to the full test voltage. Do a trial run on 5 good units first, adjust the parameters until all of them pass and all the faulty ones fail, then lock those settings in. That way you don’t risk damaging your entire inventory on day one. We had a customer who skipped this, cranked 1800V on a batch of 1000 120V phone chargers, and 300 of them had their circuit boards fried—he had to scrap the whole batch. That cost him $2k in materials, not to mention a missed shipping deadline. Trial runs take 10 minutes, that’s nothing compared to a scrap run.
Now, let’s clear up a myth: Hip testing isn’t just for “bad” products. It’s a safety requirement for almost every electronic product that uses line voltage. The parameters aren’t just numbers on a screen—they’re the difference between a product that passes inspection and one that can cause a shock hazard. So when you’re adjusting, don’t treat it like a trivial step. It’s the last line of defense before your product goes to a customer.
At the end of the day, if you’re still confused about what settings to use for your specific product, don’t guess. Our team works with hundreds of manufacturers every month to tune Hipot testers to their exact needs—whether it’s a small startup making phone cases or a big brand making industrial equipment. We don’t just sell you a tester and leave you to figure it out. We help you adjust parameters, calibrate, and troubleshoot false fails, because we know how important this is.
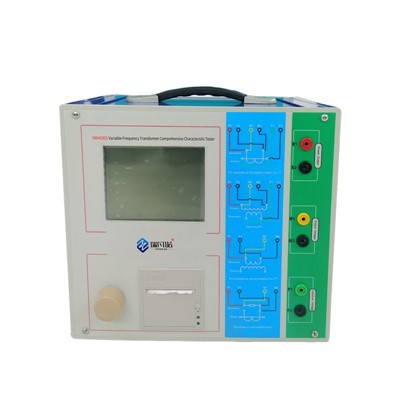
If you’re tired of guessing, tired of false passes or fails, or just need a second pair of eyes on your settings, reach out to us. We’re here to help make this part of your production line as smooth as possible.
Partial Discharge Tester References
- IEC 61010-1:2019, Safety Requirements for Electrical Equipment for Measurement, Control, and Laboratory Use
- UL 60335-1:2020, Household and Similar Electrical Appliances – Safety – Part 1: General Requirements
- Federal Aviation Administration (FAA), Electrical Test Equipment Maintenance Manual, 2021
Refine On (Hebei) Electric Power Technology Co., Ltd.
Refine On (Hebei) Electric Power Technology Co., Ltd. is one of the most reliable hipot tester manufacturers and suppliers in China, also supports customized service. Please feel free to wholesale advanced hipot tester at competitive price from our factory. Contact us for quotation.
Address: Building 13, Liandong U Valley, No.64, Jing SAN South Street, Economic Development Zone, Mancheng District, Baoding City, China
E-mail: victor@transformer-test.com
WebSite: https://www.transformer-test.com/
